Wednesday, November 22, 2023

AECP Level 2 - With a Twist

Today's course was called "With a Twist".  This was a great class to learn about different ways you can use techniques you already know and do today but in a different way (or with a twist).

My focus for today's card was a section called "Cutting It Oddly".  I really love odd shapes and odd cuts, so this was something that really sparked an interest.  But this card did not go in the direction I had planned.  That is ok, I still really enjoyed making something different.

I started today with the Altenew Garden Trellis Cover Die and cut this in white cardstock.  I adhered this to my navy A2 card base with some glue.  

Next I marked off where I wanted to cut a triangle out from this trellis.  I mark this off because when I get it in the trimmer, I am likely to get to the wrong section.  Then I used the paper trimmer to cut out a triangle only on the top panel.  This will now show the inside bottom part.

I decided I wanted to use my hot foil machine and I used the Altenew Linear Life: Tropical Garden set to foil some flowers and leaves.  I wanted the flowers in dark blue and the leaves in green.  I was struggling to get the right foiling settings for this and was not sure what I wanted to do.  Then I got an idea.

I had just received a hot foil plate so I could use my negative pieces.  So I took my flowers and my leaves and put the negative pieces on some white card stock.  I really like how these turned out!!  I then die cut all my flowers and leaves.

I now took my card base and opened it up.  I stamped some flowers and leaves on the bottom so it would peek through the triangle that was cut out on front.  I used a post-it note to mask off the areas where needed.  I used my copic marker to color in the middle area.

Now came assembly time.  I laid out the flowers and leaves and started gluing them all together to make a panel of flowers/leaves. 

Then I put foam tape on the back of all this.  I glued on a previously foiled sentiment from the Altenew Essential Sentiments Bundle and then put my flowers on top of this.

I originally thought I wanted the pop of white of the flowers with a blue outline, but I do really like how these tone on tone flowers look on this card.  I would love to hear what you think.

Happy Crafting.

Donna T.


Products Used:

Altenew Garden Trellis Cover Die 


Altenew Linear Life: Tropical Garden

Altenew Essential Sentiments Bundle

Catherine Pooler Ink - Juniper Mist
Catherine Pooler Ink - Grass Skirt
Copic Marker - B39
Waffle Flower 5x6 Foil Plate
Navy A2 Card Base
A2 White card panels
Deco Foil Hot Foil - Twilight
Glimmer Hot Foil Variety Pack - Green Foil
Stamping Platform
Crafter's Companion Hotfoil Press
Crafter's Companion Gemini II
Foam Tape
Bearly Art Glue
Tape Runner
Paper trimmer
Post It Note


Monday, November 20, 2023

AECP Level 2 - Polychromatic

 The course today was called polychromatic and was really about using color in different ways.  I found the course interesting and am looking forward to incorporating the techniques into my future projects.

For my project today, I decided to do a monochromatic background and then use my color wheel to choose my flower color to bring a pop of color.


I started with a turquoise A2 card panel and stamped the flower image outline using a color similar to the card panel color.  I actually tried two different colors and picked one after all was stamped for this project and saved the other for a later project.


Then, looking at the color wheel, I chose triad colors of yellow-orange and red-violet.  I used these to blend on my stencil for the flower and then added the green leaves.  This is a layering stencil, so it made a beautiful end result.

I decided to stamp the "You are the" directly onto the card panel.  Then I glued down the "perfect gift" I had die cut in black right under the stamped sentiment.  Then, I die cut the flower and put it on foam tape and adhered to my card panel after trimming it down to 4 x 5 1/4".

Since I lost the dot on the "i", I used a jewel for this and added some more pearls and diamonds around the flower to add some interest.  Last, I added some turquoise stickles to the middle of the flower to give a little more sparkle and dimension.

This was a pretty quick card, but makes a pretty big impact.  I hope you have enjoyed and will try some monochromatic backgrounds.

Happy Crafting.

Donna T.


Products used:

Altenew Perfect Gift Stamp, Die and Stencil set

Color Wheel

Blending brushes

Stamping platform

Versafine Black ink

Catherine Pooler Ink - Sugared Lavendar

Catherine Pooler Ink - Royal Treatment

Catherine Pooler Ink - Catching Rays

Catherine Pooler Ink - Euchalyptus

Catherine Pooler Ink - Martini

Catherine Pooler Ink - Skylight

This Calls for Confetti Gala Diamond and Pearl Mix

The Calls for Confetti Steel Sparkle Gems

Turquoise Stickles

Foam Tape

Bearly Arts Glue

A2 White card base

White card panel

Black cardstock

Turquoise cardstock


Thursday, November 16, 2023

AECP Level 2 - Masking Unleashed

Today, I have a confession to make.  I started card making about 25 years ago.  Back then, there were no die cutting machines, so fussy cutting and masking was something that was taught in intermediate card making classes.  And I could never get the hang of masking.  Then again, we did not have stamping platforms either, so using a block and hoping that everything lined up with red rubber stamps on wood blocks was always a wish and a prayer for me.

So, when I read what this course was, I already had my defenses up.  However, the card making tools have come a long way during that 15 year break I took from it.  I have to continually remind myself of this.  And I'm really glad I opened up to this today!!  This course gave a lot of great ideas and I'm pretty sure I'll be trying several in the future.

For my project, I decided to use the Altenew Build-A-Flower: Bearded Iris Stamp Set.  This is one of my favorites!!  I started my stamping my ideas on a scrap piece of paper to get an idea of how I would layer this stamp.  Then, I stamped two flower images and 4 leaves onto some Mask-It tape.  I fussy cut these out, cutting on the inside edge of the line to that the images would flow together.

I took my 4 x 5 1/4" panel of cardstock and stamped my flower I wanted on top in black ink.  I put a mask on this and then stamped the flower I wanted behind this one.  I also put a mask over this as well.

Then I proceeded to stamp my leaves coming off the flowers and put masks on each of these.  When I was done, I had my entire collage stamped in black ink and then covered by masks.

I covered all the images because I wanted to lightly stencil a background.  I took a leaf stencil from my stash and used some very light green ink.  I used a paper pouncer and pounced on the ink, putting slightly more in the middle and working my way out to a lighter amount of ink.

Once done with that, it was time to start layering on color on my leaves and flowers.  I started with the last leaf I stamped because it was overlapped by another leaf.  I used the 2 layering stamps using green inks.  After that leaf was done, I was able to take off the masks of the other 3 leafs and do the layering green color on those.

Next came the flowers.  I started with the last flower I stamped (or my flower in the back).  I added the layers of color as indicated on the package.  This flower is just gorgeous!!!

One item I forgot to mention.  When I chose my card panel, I picked cardstock with a texture.  This did cause me a little bit of an issue.  When I would stamp on my base layers of color, they would come out splotchy.

To remedy this, I would put some ink from my inkpad on my glass mat.  I would also put a little water on my glass mat.  I took a small paint brush and picked up a little water and some ink and started blending this on the image.  It took a little time and some patience, but I think it did blend out beautifully.  I was careful not to get too much water, using just enough to make the ink blend.  Also, I only had to do this for the first layer and a little bit of the second layer.

Once my flowers were done, it was time to put on the finishing touches.  I have just gotten a hot foil machine and have been creating some sentiments, so I chose one of those on white cardstock.  I took my paper pouncer I used before and put some green ink over the foiling, just to take away the harsh white look.  I put this on foam tape and adhered it to the bottom of my card. 

Then I put some antique gold pearls on the card to tie in with the sentiment and to give a little bling.  

I really enjoyed making this card and masking tape available these days make masking so much easier.  I think I will be doing quite a bit more in the future.  I hope you will give it a try as well.

Happy Crafting.

Donna T.


Products Used:

Altenew Build-A-Flower: Bearded Iris Stamp Set

Catherine Pooler Ink - Matcha

Catherine Pooler Ink - Martini

Catherine Pooler Ink - Green Tea

Catherine Pooler Ink - Eucalyptus

Catherine Pooler Ink - Sixteen Candles

Catherine Pooler Ink - Pixie Dust

Catherine Pooler Ink - Flirty Fuchsia

Catherine Pooler Ink - Royal Treatment

Stamping Platform

Spectrum Noir Mask-It Tape

Picket Fence Paper Pouncer

This Calls for Confetti Antique Gold Pearl Embellishments

Momento Tuxedo Black Ink Pad

Leaf Stencil

White A2 Card Base

Tan A2 Card Panel


Monday, November 13, 2023

AECP Level 2 - Magical Marker Techniques

It's no secret that I LOVE to use alcohol markers.  When I came back to cardmaking earlier this year, I discovered these and was instantly in love with them.  This course was definitely something I looked forward to in order to get even more ideas on how to use my markers I've been collecting.

For today's project, I had an idea in my head, but had to pivot as it was not turning out the way I wanted.  But that is okay.  Sometimes pivoting gives us something even more fun!

I started with a white card panel.  I scribbled my alcohol markers on my glass mat in a row and spritzed them with alcohol and then tried running a brayer through this and onto my panel.  While this transferred, it was not the look I was trying for.  So, then I tried again, with just spraying with some alcohol and then some water.  Again, not the look I was looking for.

Finally, I realized I should use some watercolor paper.  I put my marker color on my mat and then sprayed with a little alcohol and a lot of water.  Then I dipped my paper into this and I certainly was getting closer.  I dipped a few more times, added a little more water, dipped the paper, wiped off some standing water and I finally had something I could work with.

But I did not throw away the other panels.  They end up coming into use later.

I then used the Altenew Inspiring Quotes: Step Stamp set and stamped the sun and one set of the mountains.  I then masked off the side of the mountain, to add another, but not to have them overlapping.  I wanted these to be pretty long for the length of my card.

After this, I colored in the sun with yellows and then used some violet colors to do the mountains.  After I finished the coloring, I again took my alcohol and spritzed it over the mountains.  As it seeped into the paper, the mountains would lighten.  I did this several times, taking it slow, so I could get the look I wanted.  I wanted a little shading from the drops on the mountains in places and eventually got to this look.

I then cut out my sun and mountains and began assembling.  This is where one of the extra panels I made came in.  My mountains were 4 3/4" long, so I cut my watercolor cardstock panel to 3 1/2 x 4 3/4".  I then took the sentiment and carefully stamped this onto the panel using my black ink and stamping several times lightly so the letters were still crisp.


I did not just want white under my main panel, so I took one of the panels I made before and cut it to 4 x 5 1/4" to layer on top of my white A2 base.  


I put my watercolor cardstock panel on foam and put it on top of this.  I put my mountains and sun on some foam as well to give them some dimension.

I think this card is really pretty and I like the different ways I used my markers to make this.  The look is totally different than ones I did previously (you can see my previous blog post where I used the same stamp set but with dye ink and mica sprays for the background blending).


I hope you enjoyed my trial and error.  If you have any questions or comments, please feel free to reach out.  Happy crafting.

Donna T.

Products used:

Altenew Inspiring Quotes: Step Stamp set

Copic Alcohol Markers - B18, B29, B39, V04, V05, V06, V09, V15, Y13, Y15, Y17

Watercolor paper

A2 card base

A2 white card panel

91% alcohol

Spray bottles (one for water and one for alcohol)

foam tape

Stamping platform

Momento Tuxedo Black Ink

Tape runner


Saturday, November 11, 2023

Altenew Inspiration Challenge - November 2023


This month for the Altenew Inspiration Challenge, we have a beautiful color palette.


I decided to use the Altenew Inspiring Quotes - Step stamp set.

For my first card, I used some pink mica spray for the background.  I stamped my mountains, masking one to add it twice.   I colored these, stamped my sun and sentiment.  I cut everything out and blended a little lilac on the sentiment.  I then assembled, putting my top layer on foam.

For the second card, I put some pink mica spray and white chroma mist on a background.  I then stamped the mountains (masking again).  I colored in some areas with a darker marker.   Then I ink blended a background and then used acrylic paint and water for splattering white for the stars.   Last, I stamped the sentiment and used white embossing powder.  I assembled everything, again putting top layer on foam.

I love these colors and hope you enjoy.   Happy Crafting.

Donna T.

Friday, November 10, 2023

AECP Level 2 - In the Mood for Color


 In today's course, we learned about the different colors and the moods that those colors might lead to.  It was a very interesting lesson.  I chose yellow for my main color today.  Yellow leads to Energy, Cheer and Optimism which I think we can all use.

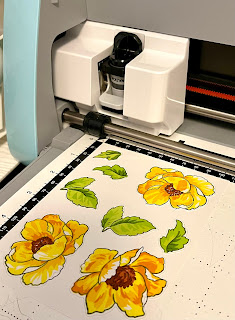
I started today by stamping all of the outline images from the Altenew Nature Blossoms Stamp Set.  I even duplicated one flower blossom and 2 of the leaves.  Then I used my stamps to go through each of the layers as indicated on the package.  

I used the yellow for my flowers and then the greens for my leaves.  And just a bit of brown/rust for the middle of the flowers.

I then used my Brother Scan 'n Cut to cut out these images as I don't have the dies for this set.  

Next came the task of laying out my design and deciding what kind of background I would like to use.  I really wanted something very natural, so I had previously foiled a greenery toner sheet. 

I thought if I added a little yellow over the top of this, it might make a nice background and even a continuation from my flowers.

I laid out my flowers and leaves.  I decided to glue down all but one of the leaves to my foil panel and then put the flowers on foam tape.  I had to be careful not to put tape on both flowers in places where they overlapped or my card would become very bulky.  I glued the one last leaf once my foam tape flowers were in place.

I had left a section on the lower right for my sentiment.  I chose the Altenew Bold Thanks Die Set.  I cut the shadow in white and the primary letters in some yellow in my scrap stash.  I then put this on the foil panel using some more foam tape.

Last I adhered the foil panel to my A2 card base and my card was complete.  I usually do not use a lot of yellow in my cards, but I really do like how this is very cheerful and will have to remember to not ignore the yellow!!

Happy Crafting.

Donna T.


Products Used:

Altenew Nature Blossoms Stamp Set

Altenew Bold Thanks Die Set

Stampin' Up Ink - Yoyo Yellow

Stampin' Up Ink - Summer Sun

Stampin' Up Ink - Mango Melody

Stampin' Up Ink - Tangerine Tango

Stampin' Up Ink - Dusty Durango

Stampin' Up Ink - Lemon Lime Twist

Stampin' Up Ink - Parakeet Party

Stampin' Up Ink - Granny Apple Green

Momento Tuxedo Black Ink

Light Green Foil

Pink and Main Fabulous Fall Foilable Kit

Blending Brush

Stamping Platform

A2 White Card Base

White Cardstock

Scrap yellow cardstock

Die cutting machine

Foam Tape

Bearly Arts Glue


AECP Level 3 Botanical Illustration Inspired Watercolor

When I was picking my final classes, this class was something that I really wanted to take, but really scared me.  I’ve never been a painter...