
I picked this course for one of my Level 3 courses because I absolutely LOVE using stencils. I was excited to continue to build on what I already do with stencils. And I certainly learned a few techniques I would have never tried without the course. I have a couple still on my list to try, but today I’m going to cover 3 techniques which resulted in 4 finished cards.
Card #1 and #2 – Using pastes and adding color
To be fair, I have added color to my paste in the past, however, I always forget to do this. So, today I decided to try this again with two different products. First was the Tim Holtz Distress Texture Paste and second was the Scrapbook.com Cloud Whip.


I started with the Distress Texture Paste. It was a bit creamier, so I decided to put it out on my Altenew Layered Dahlia Stencil set (attached using Pixie Spray to my black cardstock) and then add drops of die reinkers to the paste. Then I just took my scraper tool and pulled it down over the stencil. I continued, until the entire images was covered, even going the opposite direction a couple of times as I did not care if the colors mixed a bit.
I removed the stencil and it turned out great. I did let this dry overnight and the next day I took a black gel pen to cover a couple of areas where the paste snuck under the stencil. I decided I did not want to lose any of the images, so trimmed the border only and mounted on a 6x6 white card base.

For the sentiment, I decided on the Altenew Outlined Love
You Die and used a card panel I had made previously using Aqua Pigments like
watercolors. This made the sentiment a
little brighter on the card, but it still got a little lost. So, since I had die cut the same sentiment twice
in black (to stack under the top layer for dimension), I took the inside pieces
and placed them into the outline die cut to fill in the letters. This definitely made the sentiment pop and
stand out.

I finished with a few pearls and jewels from my stash.


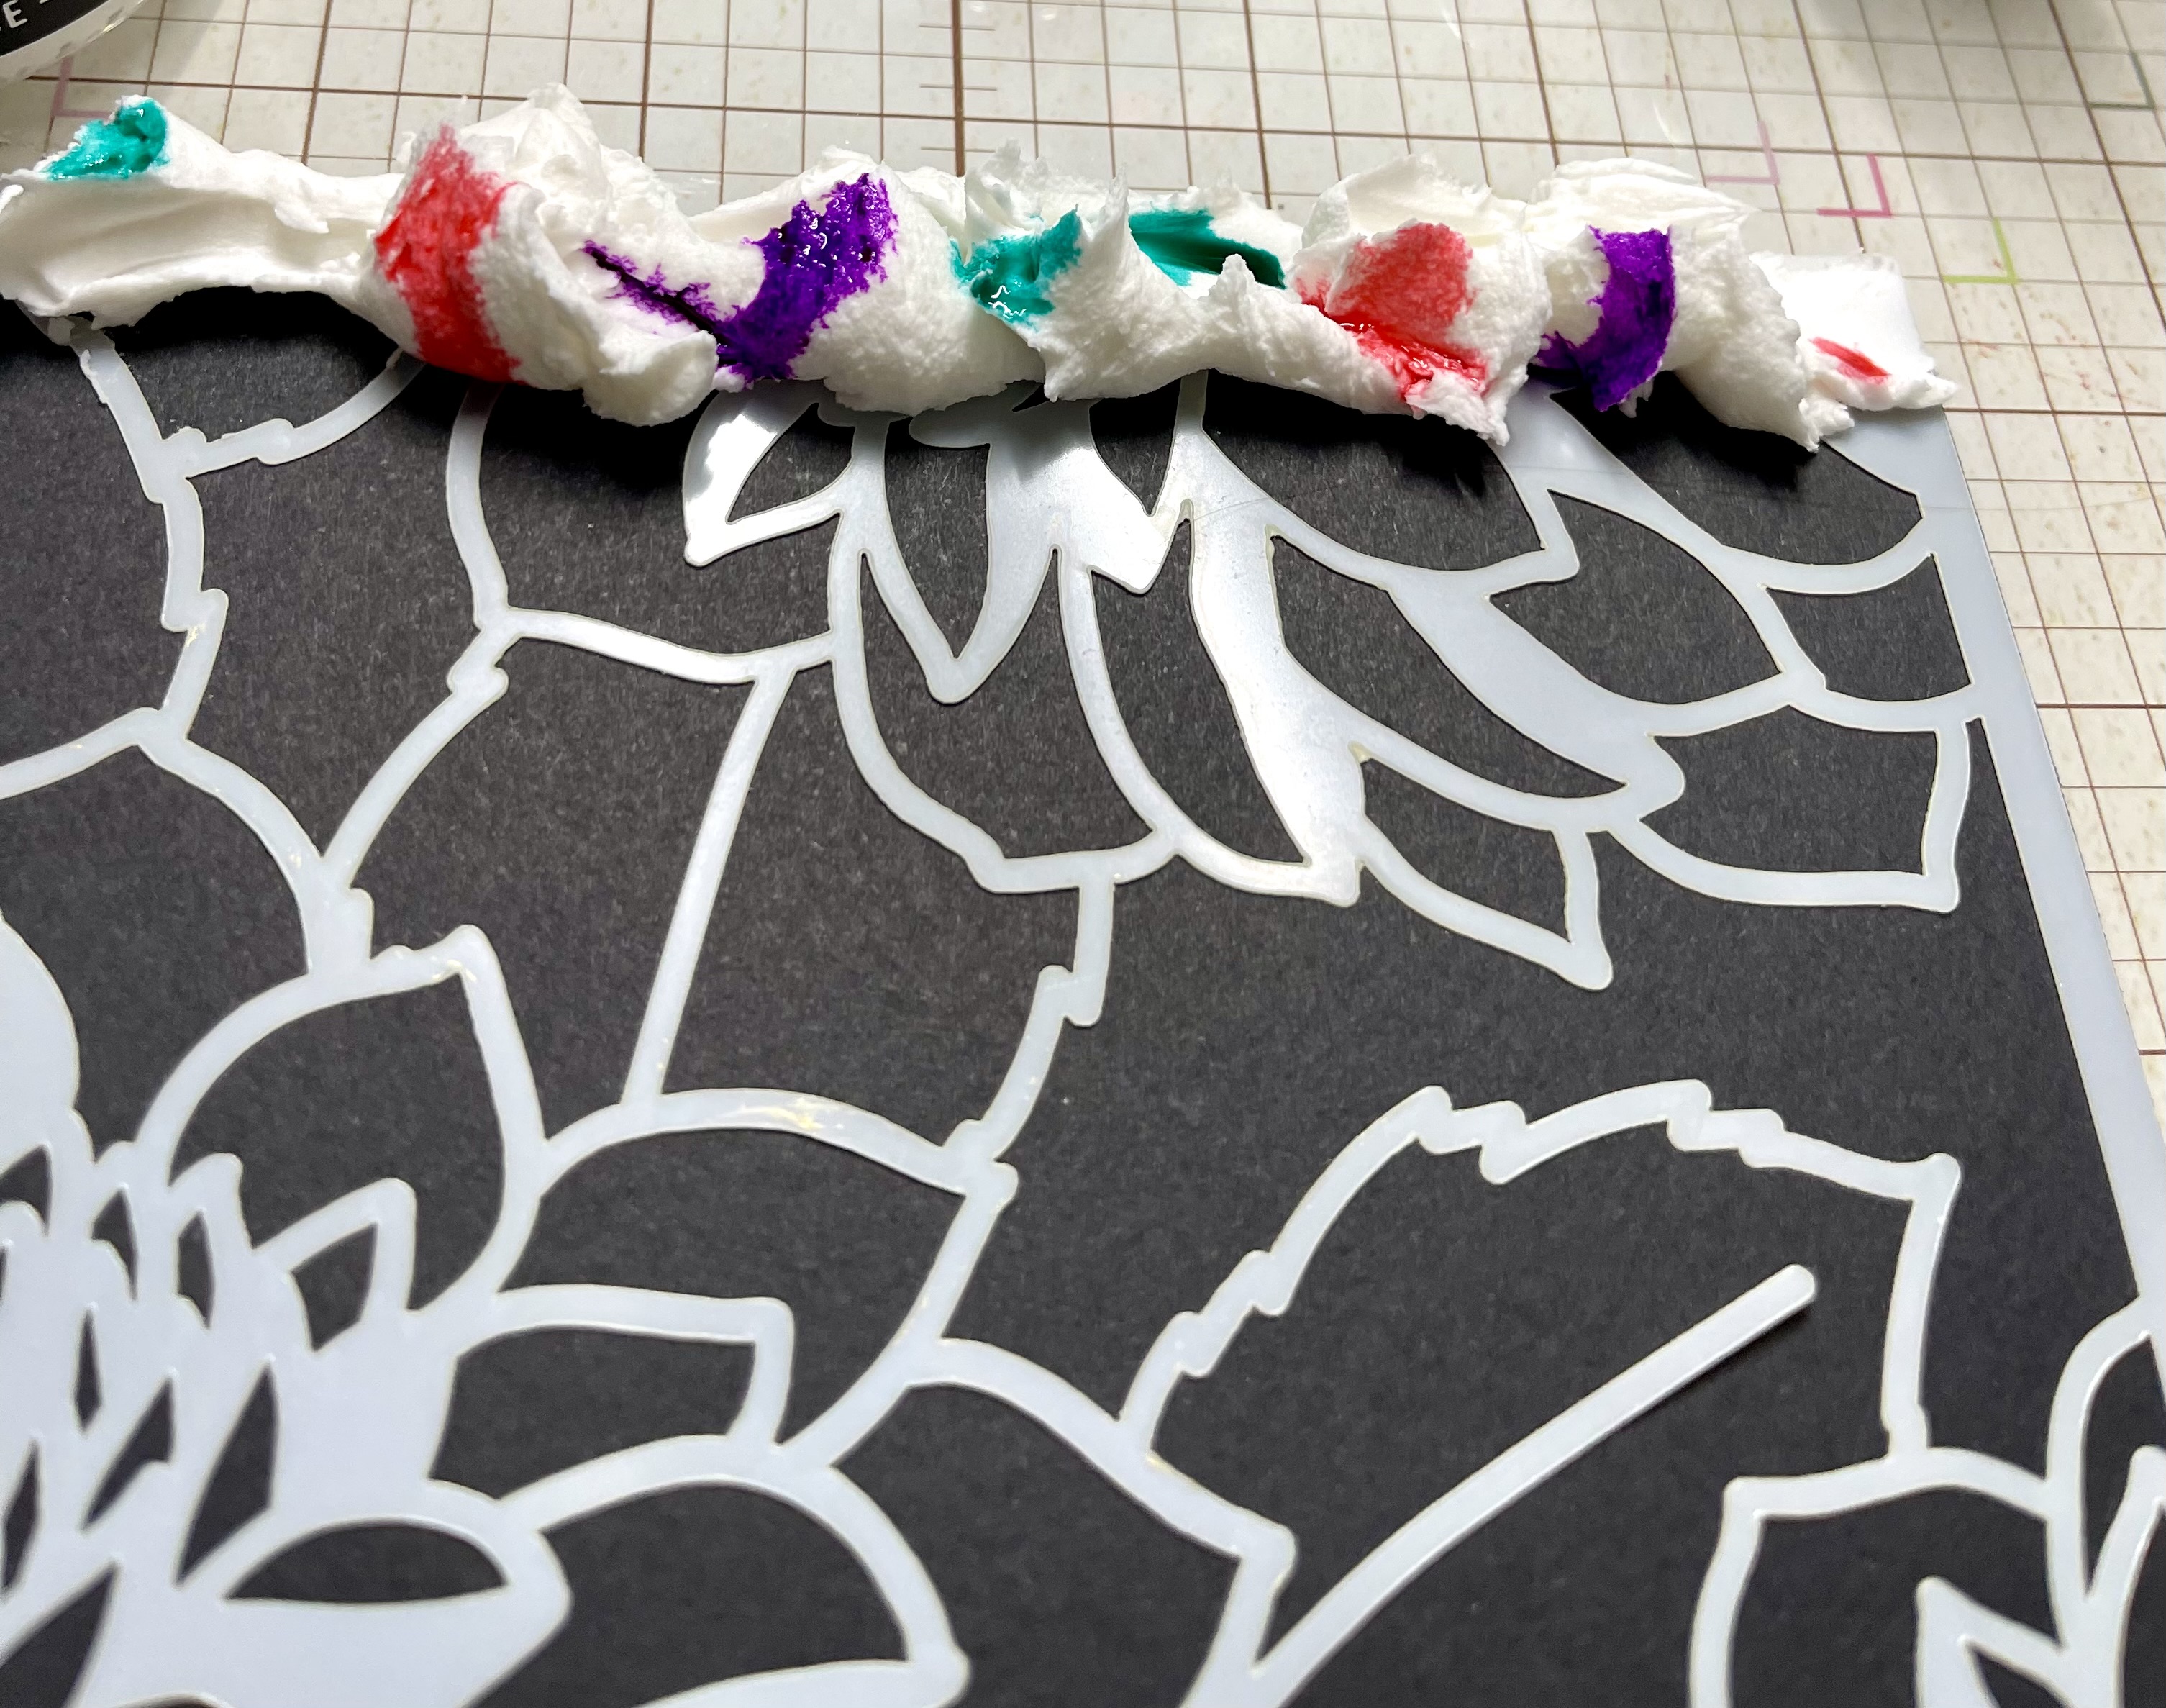
For the second of these cards, I decided to use Cloud Whip from Scrapbook.com. Now this paste is very chalky and needs something to rehydrate it. So I put out 3 scoops and added my reinkers to those piles along with a spritz of water.

After working this in, I put the colored Cloud Whip onto the Altenew Layered Kaleidoscope Stencil A attached using Pixie spray. This was still a bit chalky, so a little harder to spread, but I did get the entire area covered. After removing the stencil, the images was SO pretty. I let this one dry overnight as well before finishing.


I trimmed the border only and attached to a 6x6 white
card base. I cut one leaf type twice
from vellum from the Altenew Leaf
Essentials Die Set. I also cut a
sentiment I had from another small piece I had created previously from some
mica mists and matched my color scheme.
I mounted this on black cardstock.
Then I put that in the center with the vellum leaves coming out from
under this.

I finished off with some matching jewels and my card was complete!!

Products Used:
Card 1:
Altenew
Layered Dahlia Stencil set
Tim Holtz Distress Texture Paste – Opaque
Catherine Pooler Ink Reinkers – Cummerbund, It’s a Girl,
Pixie Dust
Background previously done using watercoloring swiping (used
for sentiment)
Black Cardstock
Palette Knife and scraper
6x6 White Card base
Bearly Arts glue
Jewels and pearls from stash
Pixie Spray
Card 2:
Altenew
Layered Kaleidoscope Stencil A
Altenew Leaf
Essentials Die Set
Scrapbook.com Cloud Whip
Catherine Pooler Ink Reinkers – Mandarin Spice, Catching
Rays and Lime Rickey
Black Cardstock
Vellum
Jewels from stash
6x6 white card base
Pixie Spray
Palette Knife and scraper
Just For You die from stash
Card #3 – Ghosting

For my next card, I tried the technique the instructors called ghosting. I used the Altenew Gilded Rose Stencil set and ink blended the first stencil for the base layer. Then I took the second stencil and sprayed the back side (that usually touches the paper) with water. I put it in place, covered with acetate and then with an acrylic block and let it sit overnight to dry. I was working on a tray (like a cafeteria tray) where I had taped down my base layer. This allowed me to set this aside easily as it dried.

The next day, I removed the stencil and the areas where the water had been where a shade lighter and looked great.

There is a stencil 3 which has two more layers. I used a really dark color on the 3rd layer and then put the stencil on for the 4th layer. I decided to try a silver paint pen through the stencil on this and it was an epic fail!!! It was way too bright and paint bled under the stencil.

So, I went back over that stencil with the original color which turned out different with the silver underneath. I then took a paint brush and touched up the areas where the silver pen had bled under the stencil.

I fussy cut the rose and attached using foam tape to an older Altenew card panel which had leaves so I did not cut any additional leaves for this flower.
I die cut the Altenew Fancy Hugs Die three times, twice on white cardstock and the last on a panel I had covered with solar paste for a little shine. I stacked these for some dimension.
I then put the sentiment on my rose and added some jewels and pearls for a little shimmer and sparkle.

Products Used:
Altenew
Gilded Rose Stencil set
Altenew retired paper pad
Jewels from stash
White cardstock
White A2 Cardbase
Premade background using solar paste (and used for
sentiment)
Tim Holtz Distress Oxide Ink Pads – Seedless Preserve, Villainous
Potion
Mister bottle
Blending brush
Bearly Arts Glue
Foam Tape
Card #4 – Stencil Printing

For this technique, I used the Altenew Heart Builder Stencil. This stencil is created where you usually blend it the first pass and then flip the stencil and blend the second pass. What you are left with is a white heart with color coming off of it.
Here is a previous card I did with this as the background:

I started with some mixed media paper. I took the stencil and covered it with Altenew’s Crisp Die ink in the Nimbus color. I then sprayed the panel with water and put it down on the paper. I covered with a paper towel and pressed down really well. I love how I could use my stencil to put on the reverse image of the stencil!!

Then I removed the stencil and cleaned it up. Next, I flipped the stencil and placed it down where the openings were over some of the area I had previously covered. I then ink blended over these with the Nimbus ink to make that area pretty dark.

When I removed the stencil, I was really pleased with how this turned out. It is so different than what I usually get when using this stencil with just ink blending.
I cut this down and layered it on a dark card stock and then on an A2 white card base. I cut the Altenew Mega You Die from some cardstock I had created using mica sprays previously. I also cut it two more times to place underneath to give some dimension. I stamped the ‘Just For” sentiment from the Altenew Build-A-Garden: Rosa Gallica stamp set.

I added a little sequin and jewels to give a little pizzazz around the sentiment.

Products Used:
Altenew
Build-A-Garden: Rosa Gallica
Altenew Crisp Die Ink – Nimbus
Previously created background using Sprays, used to cue
sentiment
Mixed Media paper
Black cardstock
White A2 card base
Sequin and jewels from stash
Black die ink
Foam tape
Bearly Arts glue
Spray mister
Blending brush
These were some fun ways to use stencils. And as I mentioned, I have a couple more
things to try in the future. I love
having a crafty “to do” list to work on!!
Happy Crafting.
Donna T.


OMG! So many brilliant projects!!
ReplyDelete